正如注释所写,类型转换时,要注意,我参照资料1转为int8,在通道转换时出现了错误Assertion failed) VScn::contains(scn) && VDcn::contains(dcn) && VDepth::contains(depth) in function ‘CvtHelper’,参照资料2进行解决。
defget_image_hull_mask(image_shape, image_landmarks, ie_polys=None): # get the mask of the image if image_landmarks.shape[0] != 68: raise Exception( 'get_image_hull_mask works only with 68 landmarks') int_lmrks = np.array(image_landmarks, dtype=np.int)
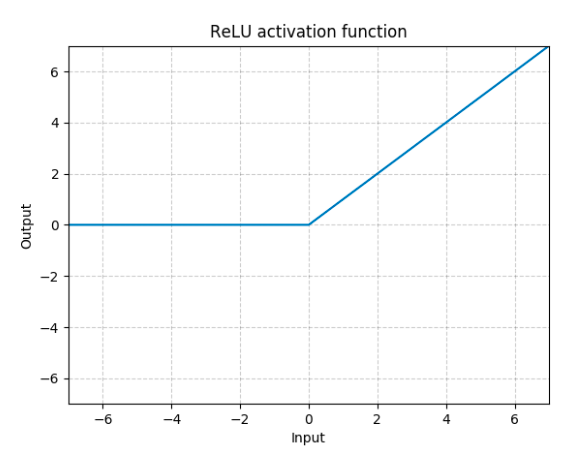
defforward(self, x): # Max pooling over a (2, 2) window x = F.max_pool2d(F.relu(self.conv1(x)), (2, 2)) # If the size is a square you can only specify a single number x = F.max_pool2d(F.relu(self.conv2(x)), 2) x = x.view(-1, self.num_flat_features(x)) x = F.relu(self.fc1(x)) x = F.relu(self.fc2(x)) x = self.fc3(x) return x
defnum_flat_features(self, x): size = x.size()[1:] # all dimensions except the batch dimension num_features = 1 for s in size: num_features *= s return num_features
# 计算损失值 output = net(input) target = torch.randn(10) # a dummy target, for example target = target.view(1, -1) # make it the same shape as output criterion = nn.MSELoss()
loss = criterion(output, target) print(loss)
反向传播
1 2 3 4 5 6 7 8 9 10
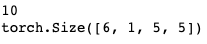
# 反向传播前后conv1的偏置项的变化 net.zero_grad() # zeroes the gradient buffers of all parameters
print('conv1.bias.grad before backward') print(net.conv1.bias.grad)
loss.backward()
print('conv1.bias.grad after backward') print(net.conv1.bias.grad)
# 使用python来实现这个规则 learning_rate = 0.01 for f in net.parameters(): f.data.sub_(f.grad.data * learning_rate)
1 2 3 4 5 6 7 8 9 10 11 12
# 使用内置包 import torch.optim as optim
# create your optimizer optimizer = optim.SGD(net.parameters(), lr=0.01)
# in your training loop: optimizer.zero_grad() # zero the gradient buffers output = net(input) loss = criterion(output, target) loss.backward() optimizer.step() # Does the update 实现参数更新,一般放在反向传播后面
import torch # 构造一个5x3矩阵,不初始化。 x = torch.empty((5, 3) print(x)
1 2 3
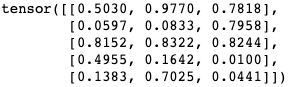
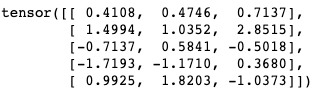
# 构造一个随机初始化的矩阵 x = torch.rand((5, 3)) print(x)
1 2 3
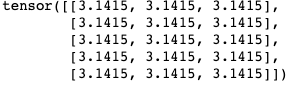
# 构造一个填充某个值的矩阵 x = torch.full((5, 3), 3.1415) print(x)
1 2 3
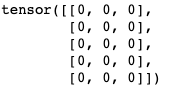
# 构造全为0的矩阵,且数据类型为long x = torch.zeros((5, 3), dtype = torch.long) print(x)
1
2
3
4
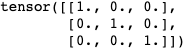
# 构造单位矩阵 # torch.eye(n, m=None, out=None, dtype=None, layout=torch.strided, device=None, requires_grad=False) → Tensor # Returns a 2-D tensor with ones on the diagonal and zeros elsewhere. torch.eye(3)
1 2 3
# 使用数据构造一个张量 x = torch.tensor([5.5, 3]) print(x)
1 2 3 4 5 6 7 8
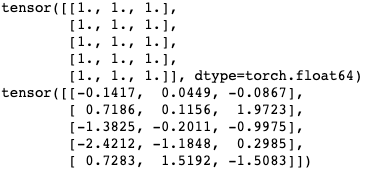
# 用已经存在的tensor构造一个tensor x = x.new_ones((5, 3), dtype = torch.double) # new_* methods take in sizes print(x)
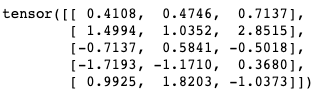
x = torch.randn_like(x, dtype = torch.float) # size和原x的size相同,但数据类型不同 print(x)
1 2
# 获取维度信息 size() print(x.size())
1 2 3
# 加法1 + y = torch.rand(5, 3) print(x + y)
1 2 3 4
# 加法2 torch.add # torch.add(input, alpha=1, other, out=None) # Each element of the tensor other is multiplied by the scalar alpha and added to each element of the tensor input. The resulting tensor is returned. print(torch.add(x, y))
1 2 3 4
# 提供一个输出tensor作为参数 result = torch.empty((5, 3)) torch.add(x, y, out = result) print(x + y)
1
2
3
4
5
# add x to y (in-place) # 即将x+y的值赋给y # 任何使张量会发生变化的操作都有一个前缀 y.add_(x) print(y)
1 2 3 4 5 6
# 改变大小:如果你想改变一个 tensor 的大小或者形状,你可以使用 torch.view:

x = torch.randn(4, 4)
y = x.view(16)
z = x.view(-1, 8)  # the size -1 is inferred from other dimensions
print(x.size(), y.size(), z.size())
Usage: onedrive [options] --synchronize Do a one time synchronization onedrive [options] --monitor Monitor filesystem and sync regularly onedrive [options] --display-config Display the currently used configuration onedrive [options] --display-sync-status Query OneDrive service and report on pending changes onedrive -h --help Show this help screen onedrive --version Show version
Options:
--auth-files ARG Perform authorization via two files passed in as ARG in the format `authUrl:responseUrl` The authorization URL is written to the `authUrl`, then onedrive waits for the file `responseUrl` to be present, and reads the response from that file. --check-for-nomount Check for the presence of .nosync in the syncdir root. If found, do not perform sync. --check-for-nosync Check for the presence of .nosync in each directory. If found, skip directory from sync. --confdir ARG Set the directory used to store the configuration files --create-directory ARG Create a directory on OneDrive - no sync will be performed. --debug-https Debug OneDrive HTTPS communication. --destination-directory ARG Destination directory for renamed or move on OneDrive - no sync will be performed. --disable-notifications Do not use desktop notifications in monitor mode. --disable-upload-validation Disable upload validation when uploading to OneDrive --display-config Display what options the client will use as currently configured - no sync will be performed. --display-sync-status Display the sync status of the client - no sync will be performed. --download-only Only download remote changes --dry-run Perform a trial sync with no changes made --enable-logging Enable client activity to a separate log file --force Force the deletion of data when a 'big delete' is detected --force-http-1.1 Force the use of HTTP/1.1 for all operations (DEPRECIATED) --force-http-2 Force the use of HTTP/2 for all operations where applicable --get-O365-drive-id ARG Query and return the Office 365 Drive ID for a given Office 365 SharePoint Shared Library --get-file-link ARG Display the file link of a synced file --help -h This help information. --local-first Synchronize from the local directory source first, before downloading changes from OneDrive. --log-dir ARG Directory where logging output is saved to, needs to end with a slash. --logout Logout the current user --min-notify-changes ARG Minimum number of pending incoming changes necessary to trigger a desktop notification --monitor -m Keep monitoring for local and remote changes --monitor-fullscan-frequency ARG Number of sync runs before performing a full local scan of the synced directory --monitor-interval ARG Number of seconds by which each sync operation is undertaken when idle under monitor mode. --monitor-log-frequency ARG Frequency of logging in monitor mode --no-remote-delete Do not delete local file 'deletes' from OneDrive when using --upload-only --print-token Print the access token, useful for debugging --remove-directory ARG Remove a directory on OneDrive - no sync will be performed. --resync Forget the last saved state, perform a full sync --single-directory ARG Specify a single local directory within the OneDrive root to sync. --skip-dir Skip any directories that match this pattern from syncing --skip-dot-files Skip dot files and folders from syncing --skip-file ARG Skip any files that match this pattern from syncing --skip-size Skip new files larger than this size (in MB) --skip-symlinks Skip syncing of symlinks --source-directory ARG Source directory to rename or move on OneDrive - no sync will be performed. --sync-root-files Sync all files in sync_dir root when using sync_list. --syncdir ARG Specify the local directory used for synchronization to OneDrive --synchronize Perform a synchronization --upload-only Only upload to OneDrive, do not sync changes from OneDrive locally --user-agent ARG Specify a User Agent string to the http client --verbose -v+ Print more details, useful for debugging (repeat for extra debugging) --version Print the version and exit
Options:
-4            Resolve hostnames only to IPv4 addresses.
-6            Resolve hostnames only to IPv6 addresses.
-a            Force all capabilities into each window's termcap.
-A -[rR]     Adapt all windows to the new display width & height.
-c file       Read configuration file instead of '.screenrc'.
-d (-r)       Detach the elsewhere running screen (and reattach here).
-dmS name     Start as daemon: Screen session in detached mode.
-D (-r)       Detach and logout remote (and reattach here).
-D -RR        Do whatever is needed to get a screen session.
-e xy         Change command characters.
-f            Flow control on, -fn = off, -fa = auto.
-h lines      Set the size of the scrollback history buffer.
-i            Interrupt output sooner when flow control is on.
-l            Login mode on (update /var/run/utmp), -ln = off.
-ls [match]   or
-list         Do nothing, just list our SockDir [on possible matches].
-L            Turn on output logging.
-m            ignore $STY variable, do create a new screen session.
-O            Choose optimal output rather than exact vt100 emulation.
-p window     Preselect the named window if it exists.
-q            Quiet startup. Exits with non-zero return code if unsuccessful.
-Q            Commands will send the response to the stdout of the querying process.
-r [session]  Reattach to a detached screen process.
-R            Reattach if possible, otherwise start a new session.
-s shell      Shell to execute rather than $SHELL.
-S sockname   Name this session <pid>.sockname instead of <pid>.<tty>.<host>.
-t title      Set title. (window's name).
-T term       Use term as $TERM for windows, rather than "screen".
-U            Tell screen to use UTF-8 encoding.
-v            Print "Screen version 4.01.00devel (GNU) 2-May-06".
-wipe [match] Do nothing, just clean up SockDir [on possible matches].
-x            Attach to a not detached screen. (Multi display mode).
-X            Execute <cmd> as a screen command in the specified session.

 首先贴出python代码 ` ```python
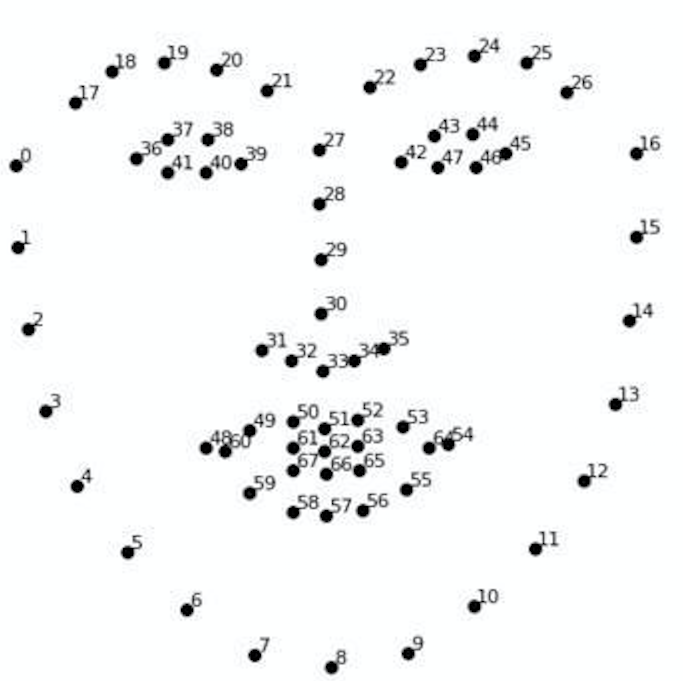
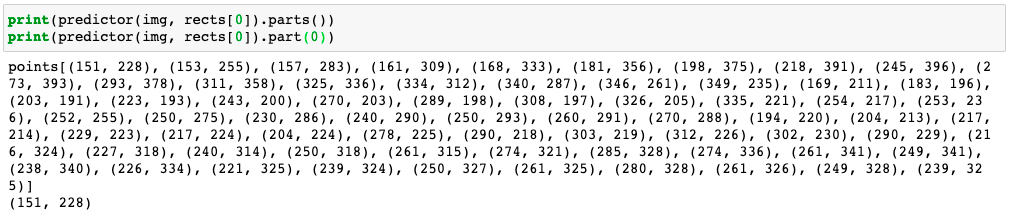 测试图片的原图与标注关键点后图片如下图所示。


 这样就完成人脸检测—>人脸关键点检测—>人脸分割—>人脸对齐。 具体代码参照
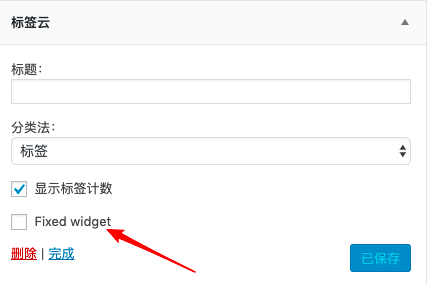 将需要固定的工具的
 最后实现效果是左侧栏滑到底时,直接回到顶部。
 注意:上面代码修改都是


 注意 1. 求导只对用户定义的变量进行,即对各个leaf Variable计算梯度 2. 运算结果变量的“requires_grad”是不可以更改的,且不会改变
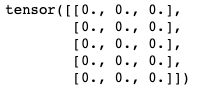


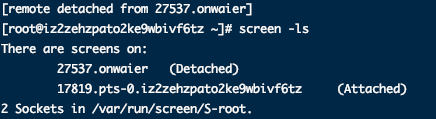
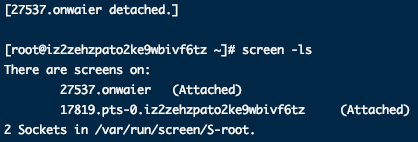
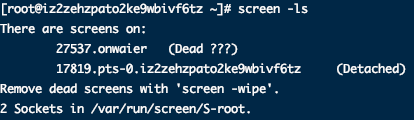
 执行
执行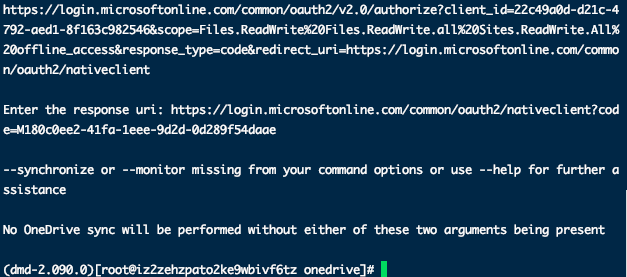 复制链接,输入浏览器登录账号进行授权,再将授权后的链接地址复制到SSH客户端运行。
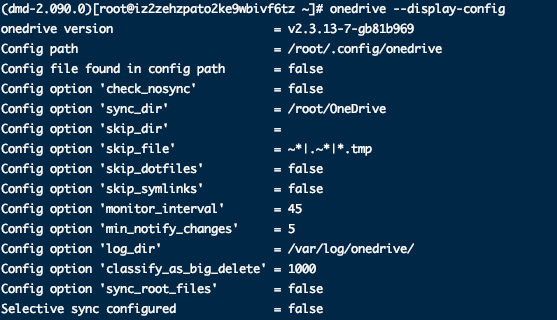
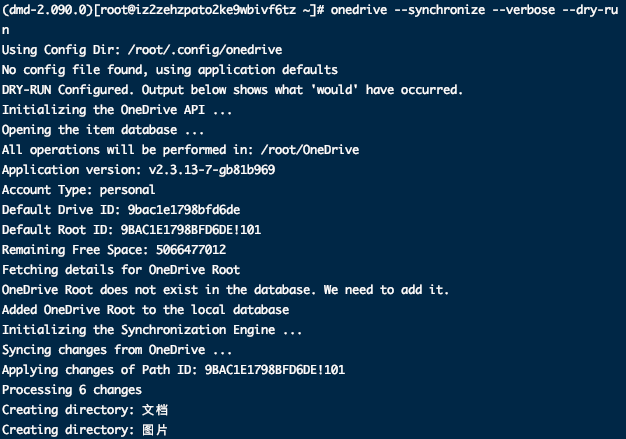 展示执行同步命令即将发生的。 Note: —dry-run can only be used with —synchronize. It cannot be used with —monitor and will be ignored.
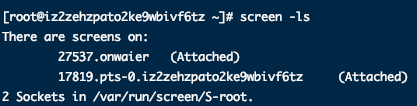

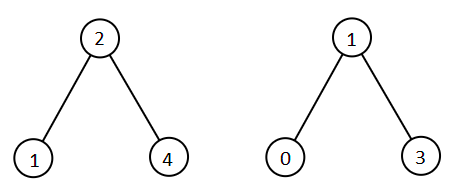 输入:root1 = [2,1,4], root2 = [1,0,3] 输出:[0,1,1,2,3,4] 示例 2: 输入:root1 = [0,-10,10], root2 = [5,1,7,0,2] 输出:[-10,0,0,1,2,5,7,10] 示例 3: 输入:root1 = [], root2 = [5,1,7,0,2] 输出:[0,1,2,5,7] 示例 4: 输入:root1 = [0,-10,10], root2 = [] 输出:[-10,0,10] 示例 5:
 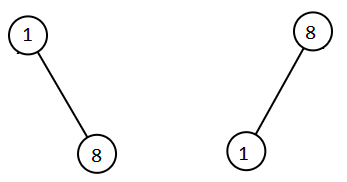 输入:root1 = [1,null,8], root2 = [8,1] 输出:[1,1,8,8] 提示: 每棵树最多有 5000 个节点。 每个节点的值在 [-10^5, 10^5] 之间。